Agriculture
NextCC provides reliable integration of PWM based agricultural flow meters. It can read the pump signals, process them and forward the flow rate and amount of fluid consumed to LaunchPad. Currently, the agricultural setup is only supported on Ardupilot systems.
Setup
Complete the NextCC Hardware Setup before starting the agriculture setup.
The simplified schematics of the connections is given below.
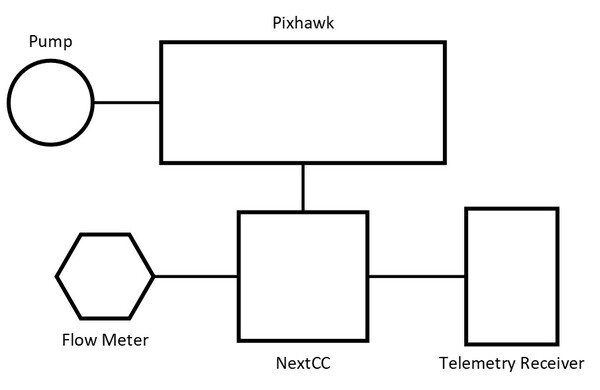
Pump Integration with Pixhawk
Follow the Ardupilot Crop Sprayer documentation to integrate the pump with the Pixhawk.
Flow Meter Integration with NextCC
A flow meter has three pins, i.e., VCC, GND and signal.
- Use the VCC and the GND pins to power the flow meter. Do not use the NextCC to power the flow meter.
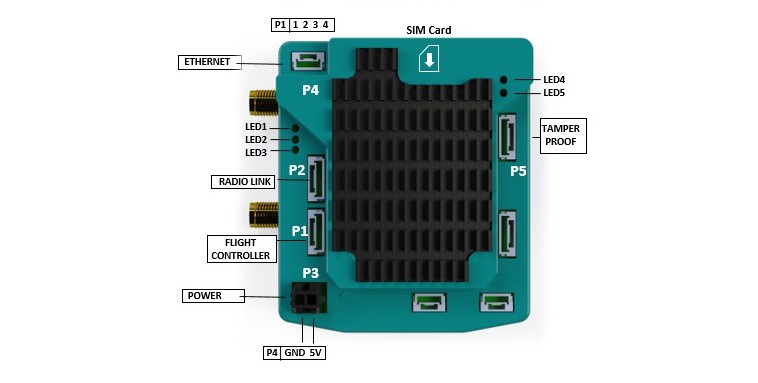
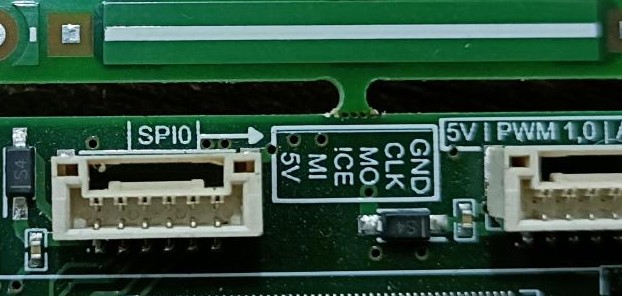
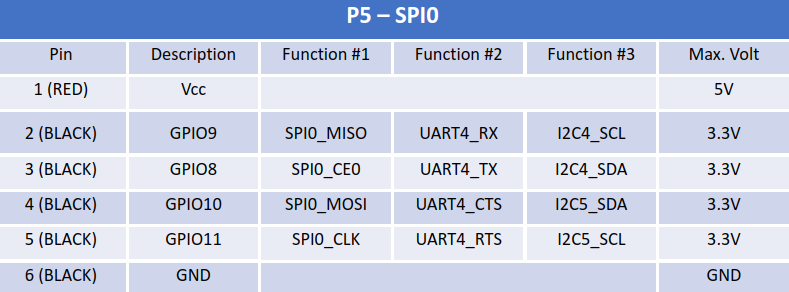
- Connect the signal pin of the flow meter to the P5 (SPI0) port of the NextCC. The signal pin goes to the pin marked as ICE on the port. In the pin out diagram, it is mentioned as the GPIO8 pin.
- This is the same port to which the tamper proof module is connected, so you can simply put the signal wire to the tamper proof module connector. Alternatively, you can create a new connector.
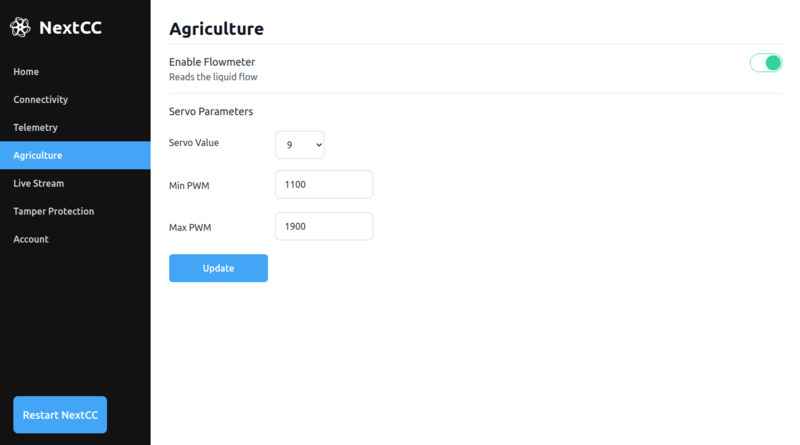
Software Configuration
Follow the NextCC Software Setup to access the NextCC Dashboard. Go to
the Agriculture section.
- Click the switch to enable the flow meter reading.
- Set the
Servo Valueto the servo pin of your pump. - Set the
Min PWMto the minimum pump servo output. - Set the
Max PWMto the maximum pump servo output. - Click the
Updatebutton to save the settings. - Restart the drone.
Calibration
Refer the Flow Meter Calibration section in the LaunchPad Drone Settings for
instruction on how to calibrate the flow meter.
Spray Mission
Refer the Spray Single Grid Mission page for instructions on how to plan automated spray missions with LaunchPad.